1. Row, Column class
flutter로 UI 작업시 Row와 Column로 배치 레이아웃을 잡을 수 있다. Row()으로 감싸서 children 속성에 Widget(Container, Text, SizedBox 등)을 넣어주면 가로로 위젯들이 배치가 된다. Column()은 세로로 배치가 된다.

MainAxisAlignment & CrossAxisAlignment
Row의 경우 main axis은 수평으로 실행되고 cross axis은 수직으로 실행된다. Column의 경우 main axis은 수직으로 실행되고 cross axis은 수평으로 실행된다.
2. center, start, end, spacebetween
- MainAxisAlignment.center
- Row() : 가로축 기준 가운데 정렬
- Column() : 세로축 기준 가운데 정렬
- MainAxisAlignment.start
- Row(): 가로축 기준 왼쪽 정렬
- Column() : 세로축 기준 위쪽 정렬
- MainAxisAlignment.end
- Row(): 가로축 기준 오른쪽 정렬
- Column() : 세로축 기준 아래쪽 정렬
- MainAxisAlignment.spaceBetween
- child widget를 시작과 끝에 배치하고, 시작과 끝 위젯의 사이에 나머지 child widget을 배치한다. (시작과 끝 사이의 Widget의 나머지 공간은 균일)
- CrossAxisAlignment.start
- Row(): 가로축 기준 위쪽 정렬
- Column() : 세로축 기준 왼쪽 정렬
- CrossAxisAlignment.end
- Row(): 가로축 기준 아래 정렬
- Column() : 세로축 기준 오른쪽 정렬
3. Transform class
- Transform.scale() : 크기를 조절
- Transform.translate() : 위치를 조절
- Transform.rotate() : 각도를 조절
📝 Sample Code
  Transform.scale(
  	scale: 5,
    child: const Icon(
    Icons.euro_rounded,
    color: Colors.white,
    size: 98,
),
4. Reusable Widgets
위젯을 분리하여 재사용할 수 있는 컴포넌트로 만들 수 있다.
command + . 에서 Extract Widget 선택 후 이름을 지정하면 자동으로 해당 파일 내에서 분리를 해준다.
📝 Sample Code
//button.dart
import 'package:flutter/material.dart';

class Button extends StatelessWidget {
  final String text; //위젯 안에서 변경할 값들을 선언해준다.
  final Color bgColor;
  final Color textColor;
  const Button({
    super.key,
    required this.text,
    required this.bgColor,
    required this.textColor,
  });
  @override
  Widget build(BuildContext context) {
    return Container(
      decoration: BoxDecoration(
        color: bgColor,
        borderRadius: BorderRadius.circular(20),
      ),
      child: Padding(
        padding: const EdgeInsets.symmetric(
          vertical: 20,
          horizontal: 50,
        ),
        child: Text(
          text,
          style: TextStyle(
            color: textColor,
            fontSize: 17,
          ),
        ),
      ),
    );
  }
}
버튼을 재사용하고 싶다면 클래스 이름과 함께 필요한 파라미터를 작성해주면 된다. 밑의 샘플코드는 required된 text, bgColor, textColor을 적어주어 작성하였다.
📝 Sample Code
 Button(
         text: "Transfer",
         bgColor: Color(0xFFF1B33B),
         textColor: Colors.black,
       ),
5. Developer tools & Widget Inspector
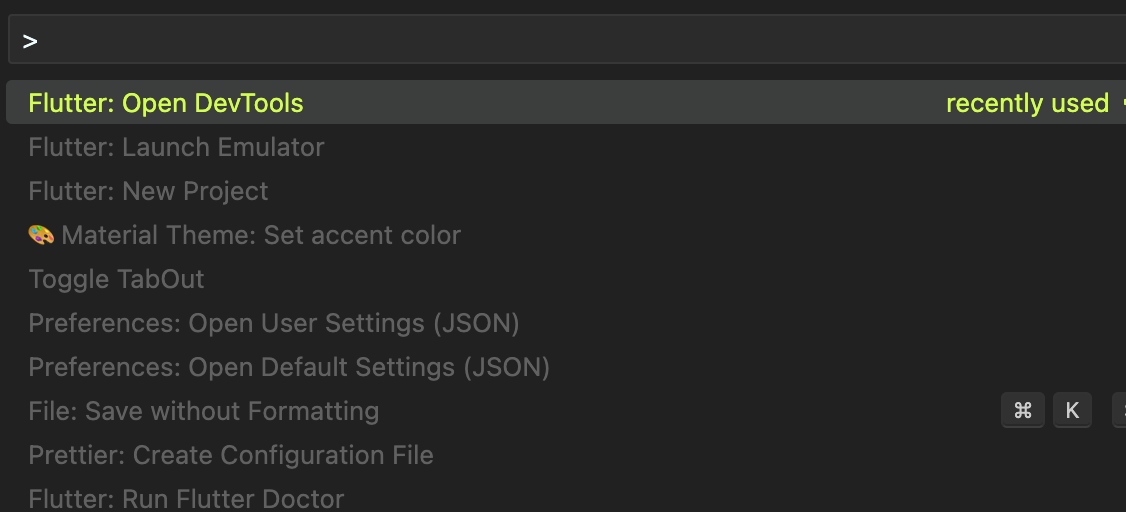
DevTools는 Dart와 Flutter를 위한 성능 및 디버깅 도구이며 UI 레이아웃, 상태(state)를 점검할 수 있도록 도와준다. 그 외 CPU, Network, Debug Memory issue, 코드 분석, 진단 등 여러 복합적인 기능들을 제공한다. 주의할 점은 앱을 구동한 상태여야 한다는 것이다. 그 이후 해당 화면에 있는 open devTools를 실행할 수 있다.
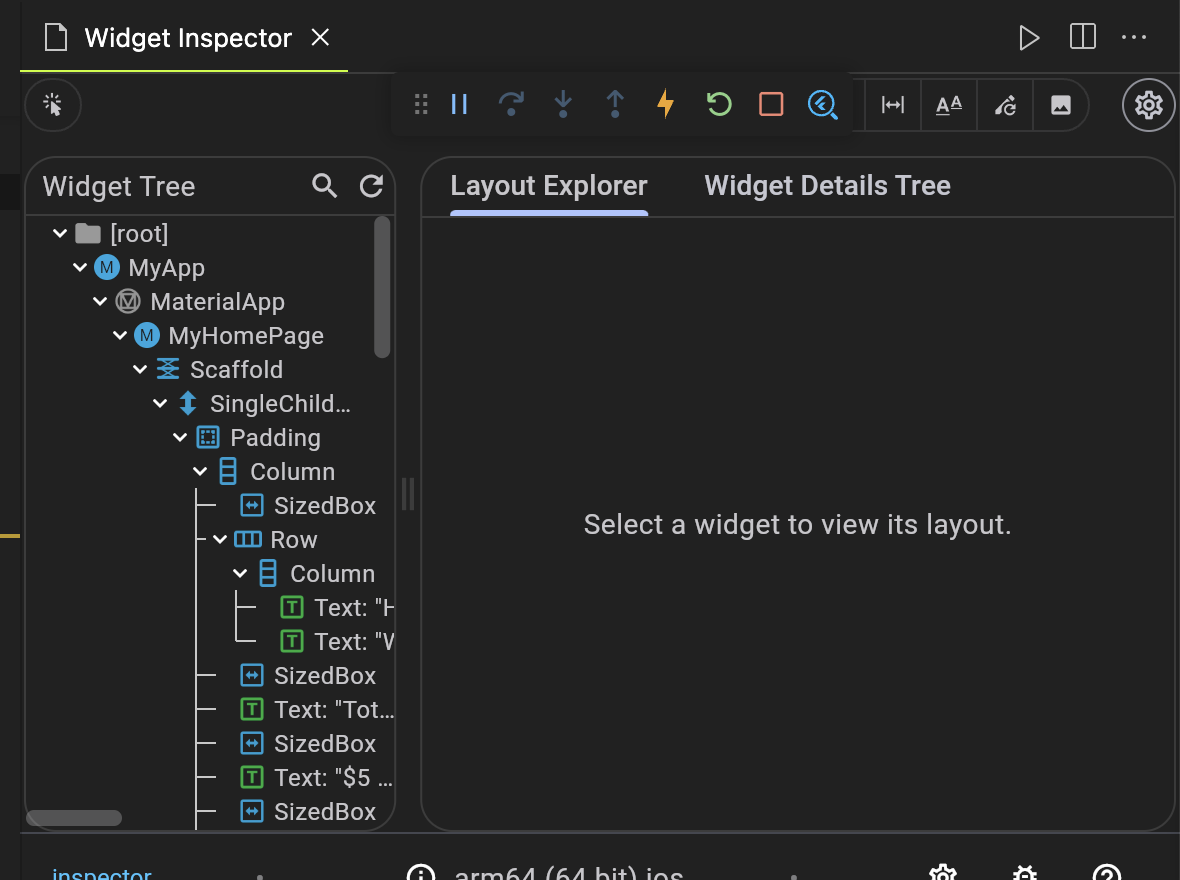
그 중 widget Inspector를 실행하면 위젯 트리를 시각화하고 탐색할 수 있다.
6. Code Challenge(#3.9)
class CurrencyCard extends StatelessWidget {
  final String name, code, amount;
  final IconData icon;
  final bool isInverted;
  final _blackColor = const Color(0xFF1F2123);
  final double offset; //새 변수 선언

  const CurrencyCard({
    super.key,
    required this.name,
    required this.code,
    required this.amount,
    required this.icon,
    required this.isInverted,
    required this.offset,
  });
    Widget build(BuildContext context) {
    return Transform.translate(
      offset: Offset(0, offset), //offset 설정
      child: Container(
        clipBehavior: Clip.hardEdge,
  //(생략)
참고자료
https://nomadcoders.co/flutter-for-beginners/lectures/4139
https://docs.flutter.dev/ui/layout
https://docs.flutter.dev/tools/devtools/inspector
https://www.w3.org/TR/css-align-3/
https://css-tricks.com/almanac/properties/j/justify-content/
'Group Study (2023-2024) > Flutter' 카테고리의 다른 글
| [Flutter] 6주차 스터디_State management와 Deep linking (1) | 2023.12.23 |
|---|---|
| [Flutter] 5주차 스터디_Data Fetch와 Future Builder (1) | 2023.12.21 |
| [Flutter] 4주차 스터디_StatefulWidget과 BuildContext (0) | 2023.11.27 |
| [Flutter] 2주차 스터디_Flutter 입문 (0) | 2023.11.13 |
| [Flutter] 1주차 스터디_Functional programming 과 Asychronous programming (0) | 2023.11.06 |