1. Widget : TextView, EditText & Button, ImageView
a. TextView
- 화면에서 Text를 표시할 때 사용하는 뷰 위젯
- EditText와 Button의 부모 클래스
- 속성의 종류
- gravity: TextView의 텍스트 정렬 방식 지정.
- text: 화면에 표시될 텍스트 지정.
- textAllCaps: 텍스트를 모두 대문자로 출력.
- textSize: 텍스트 폰트 크기 설정
- textStyle: 텍스트 스타일(bold, italic) 지정
- 예제 소스 코드

   <!-- TextView 사용하기 -->
   <TextView
        android:id="@+id/tv_title"
        android:layout_width="wrap_content"
        android:layout_height="wrap_content"
        android:text="Hello world!"	<!-- TextView에 보여줄 text입력 -->
        android:textColor="#000000" <!-- TextView의 text 색상 지정 -->
        android:textSize="20sp" 	<!-- text 크기 설정 -->
        <!-- TextView 위치 -->
        app:layout_constraintBottom_toBottomOf="parent"
        app:layout_constraintEnd_toEndOf="parent"
        app:layout_constraintHorizontal_bias="0.498"
        app:layout_constraintStart_toStartOf="parent"
        app:layout_constraintTop_toTopOf="parent" />
b. EditText & Button
- EditText: TextView로부터 파생된 클래스로, 텍스트를 입력 및 수정까지 가능한 뷰 위젯
- Button: 사용자가 화면을 터치했을 때 클릭 이벤트를 처리하는 기능을 가진 뷰 위젯
- 속성
1) EditText
- hint: TextView의 텍스트가 빈 상태일 때, 출력된 텍스트 설정.
2) Button
- setOnClickListener() : 클릭 이벤트 처리
- 예제 소스 코드
<?xml version="1.0" encoding="utf-8"?>
<androidx.constraintlayout.widget.ConstraintLayout xmlns:android="http://schemas.android.com/apk/res/android"
    xmlns:app="http://schemas.android.com/apk/res-auto"
    xmlns:tools="http://schemas.android.com/tools"
    android:layout_width="match_parent"
    android:layout_height="match_parent"
    tools:context=".MainActivity">

    <TextView
        android:id="@+id/tv_result"
        android:layout_width="wrap_content"
        android:layout_height="wrap_content"
        android:text="Hello World!"
        app:layout_constraintBottom_toBottomOf="parent"
        app:layout_constraintLeft_toLeftOf="parent"
        app:layout_constraintRight_toRightOf="parent"
        app:layout_constraintTop_toTopOf="parent" />

    <EditText
        android:id="@+id/et_id"
        android:layout_width="wrap_content"
        android:layout_height="wrap_content"
        android:layout_marginTop="16dp"			<!-- 여백 값 주기 -->
        android:ems="10"						<!-- 공백 포함하지 않고 글자 수 제한 -->
        android:hint="아이디를 입력하세요"		<!-- hint 안에 들어갈 내용 작성 -->
        android:inputType="textPersonName"
        android:minHeight="48dp"				<!-- 레이아웃의 최소 높이 -->
        app:layout_constraintBottom_toBottomOf="parent"
        app:layout_constraintEnd_toEndOf="parent"
        app:layout_constraintStart_toStartOf="parent"
        app:layout_constraintTop_toBottomOf="@+id/tv_result"
        app:layout_constraintVertical_bias="0.066" />

    <Button
        android:id="@+id/btn_getText"
        android:layout_width="wrap_content"
        android:layout_height="wrap_content"
        android:text="텍스트 가져오기"			<!-- 버튼 안 문구 작성 -->
        app:backgroundTint="#989898"			<!-- 버튼 안 색상 지정 -->
        app:layout_constraintBottom_toBottomOf="parent"
        app:layout_constraintEnd_toEndOf="parent"
        app:layout_constraintStart_toStartOf="parent"
        app:layout_constraintTop_toBottomOf="@+id/et_id"
        app:layout_constraintVertical_bias="0.141" />

</androidx.constraintlayout.widget.ConstraintLayout>
//editText에 입력되어 있는 값을 가지고 와서 editText에 입력된 값을 텍스트뷰에 set하기
package com.example.edittextbuttonkt
import androidx.appcompat.app.AppCompatActivity
import android.os.Bundle
import com.example.edittextbuttonkt.databinding.ActivityMainBinding
class MainActivity : AppCompatActivity() {
// 전역 변수로 바인딩 객체를 선언합니다.
private var mBinding: ActivityMainBinding? = null
private val binding get() = mBinding!!
override fun onCreate(savedInstanceState: Bundle?) {
super.onCreate(savedInstanceState)
//setContentView(R.layout.activity_main)
mBinding = ActivityMainBinding.inflate(layoutInflater)
setContentView(binding.root)
binding.btnGetText.setOnClickListener { // editText에 입력되어있는 값을 가지고와서 텍스트뷰에 뿌려준다.
var resultText = binding.etId.text.toString() // editText에 입력되어있는 값
binding.tvResult.setText(resultText) // 입력된 값을 텍스트뷰에 set 해줌.
}
}
// 액티비티가 파괴될 때
override fun onDestroy() {
// 바인딩 클래스의 인스턴스 참조를 정리합니다.
mBinding = null
super.onDestroy()
}
}c. ImageView
- 이미지를 표시할 수 있음.
- "rsc/drawable" 디렉토리에 이미지 파일을 복사해서 사용할 수 있음.
- 간단한 사용법
- android: src="@drawable/[파일이름]"
- 이미지 파일 이름 지정시 공백이 있으면 안 됨
(한 번 오류났었음...)
- 이미지 파일 이름 지정시 공백이 있으면 안 됨
- 예제 소스 코드
<?xml version="1.0" encoding="utf-8"?>
<androidx.constraintlayout.widget.ConstraintLayout
    xmlns:android="http://schemas.android.com/apk/res/android"
    xmlns:tools="http://schemas.android.com/tools"
    xmlns:app="http://schemas.android.com/apk/res-auto"
    android:layout_width="match_parent"
    android:layout_height="match_parent"
    tools:context=".MainActivity">

    <ImageView
        android:id="@+id/iv_profile"
        android:layout_width="200dp"
        android:layout_height="200dp"
        app:layout_constraintBottom_toBottomOf="parent"
        app:layout_constraintEnd_toEndOf="parent"
        app:layout_constraintHorizontal_bias="0.497"
        app:layout_constraintStart_toStartOf="parent"
        app:layout_constraintTop_toTopOf="parent"
        app:layout_constraintVertical_bias="0.335"
        app:srcCompat="@drawable/android" />

    <Button
        android:id="@+id/btn_toast"
        android:layout_width="wrap_content"
        android:layout_height="wrap_content"
        android:layout_marginTop="16dp"
        app:layout_constraintBottom_toBottomOf="parent"
        app:layout_constraintEnd_toEndOf="parent"
        app:layout_constraintHorizontal_bias="0.498"
        app:layout_constraintStart_toStartOf="parent"
        app:layout_constraintTop_toBottomOf="@+id/iv_profile"
        app:layout_constraintVertical_bias="0.051" />
</androidx.constraintlayout.widget.ConstraintLayout>
package com.example.imageviewkt
import android.app.Activity
import androidx.appcompat.app.AppCompatActivity
import android.os.Bundle
import android.widget.Toast
import com.example.imageviewkt.databinding.ActivityMainBinding
class MainActivity : AppCompatActivity() {
private var mBinding: ActivityMainBinding? = null
private val binding get() = mBinding!!
override fun onCreate(savedInstanceState: Bundle?) {
super.onCreate(savedInstanceState)
//setContentView(R.layout.activity_main)
mBinding = ActivityMainBinding.inflate(layoutInflater)
setContentView(binding.root)
binding.btnToast.setOnClickListener {
binding.ivProfile.setImageResource(R.drawable.robot) // 이미지 뷰에 새로운 이미지 등록
Toast.makeText(this@MainActivity, "버튼이 클릭 되었습니다", Toast.LENGTH_SHORT).show()
}
}
// 액티비티가 파괴될 때
override fun onDestroy() {
// 바인딩 클래스의 인스턴스 참조를 정리합니다.
mBinding = null
super.onDestroy()
}
}2. Layout: LinearLayout, RelativeLayout, ConstraintLayout
a. LinearLayout : 세로 또는 가로의 단일 방향으로 모든 하위 요소를 정렬하는 뷰 그룹
- android:orientation 속성(horizontal, vertical)을 사용하여 레이아웃 방향을 지정할 수 있음.
- 하위 요소는 순차적으로 스택됨
- android:layout_weight 속성으로 개별 하위 요소를 가중치에 할당할 수 있음.
- 예제 소스 코드
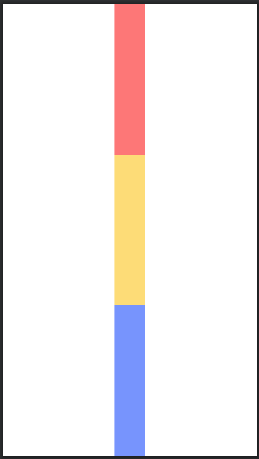

<?xml version="1.0" encoding="utf-8"?>
<LinearLayout
    xmlns:android="http://schemas.android.com/apk/res/android"
    xmlns:app="http://schemas.android.com/apk/res-auto"
    xmlns:tools="http://schemas.android.com/tools"
    android:layout_width="match_parent"
    android:layout_height="match_parent"
    tools:context=".MainActivity"
    android:orientation="horizontal"
    android:weightSum="3"
    android:gravity="center"
    >
    <!-- android:orientation="vertical" -->

    <View
        android:layout_weight="1"
        android:layout_width="50dp"
        android:layout_height="50dp"
        android:background="#FD7777"
        />

    <View
        android:layout_weight="1"
        android:layout_width="50dp"
        android:layout_height="50dp"
        android:background="#FDDC77"
        />

    <View
        android:layout_weight="1"
        android:layout_width="50dp"
        android:layout_height="50dp"
        android:background="#7794FD"
        />

</LinearLayout>
b. RelativeLayout
- 상대 위치에 하위 뷰를 표시하는 뷰 그룹
- View끼리 겹칠 수 있다.
- 예제 소스 코드
<?xml version="1.0" encoding="utf-8"?>
<RelativeLayout
    xmlns:android="http://schemas.android.com/apk/res/android"
    xmlns:app="http://schemas.android.com/apk/res-auto"
    xmlns:tools="http://schemas.android.com/tools"
    android:layout_width="match_parent"
    android:layout_height="match_parent"
    tools:context=".RelativeLayout">

    <!--    뷰끼리 겹칠 수 있다-->
    <View
        android:layout_width="match_parent"
        android:layout_height="100dp"
        android:background="#FFBBBB"
        />

    <View
        android:id="@+id/blue_view"
        android:layout_width="50dp"
        android:layout_height="50dp"
        android:background="#7FB4ED"
        />

    <View
        android:id="@+id/green_view"
        android:layout_width="50dp"
        android:layout_height="50dp"
        android:background="#C3ED7F"
        android:layout_toRightOf="@id/blue_view"
        />


</RelativeLayout>
c. ConstraintLayout : 레이아웃 구성 시, 뷰 위젯의 위치와 크기를 유연하게 조절할 수 있다.
- 예제 소스 코드
<?xml version="1.0" encoding="utf-8"?>
<androidx.constraintlayout.widget.ConstraintLayout
    xmlns:android="http://schemas.android.com/apk/res/android"
    xmlns:app="http://schemas.android.com/apk/res-auto"
    xmlns:tools="http://schemas.android.com/tools"
    android:layout_width="match_parent"
    android:layout_height="match_parent"
    tools:context=".ConstraintLayout">

    <View
        android:id="@+id/orange_view"
        app:layout_constraintStart_toStartOf="parent"
        app:layout_constraintEnd_toEndOf="parent"
        app:layout_constraintTop_toTopOf="parent"
        android:layout_width="50dp"
        android:layout_height="50dp"
        android:background="#FDBC8B"
        />

    <View
        android:id="@+id/blue_view"
        android:layout_width="50dp"
        android:layout_height="50dp"
        android:background="#81B4FF"
        app:layout_constraintTop_toBottomOf="@+id/orange_view"
        app:layout_constraintStart_toStartOf="parent"
        app:layout_constraintEnd_toEndOf="parent"
        />

    <View
        android:layout_width="50dp"
        android:layout_height="50dp"
        android:background="#FF3F82"
        app:layout_constraintTop_toBottomOf="@id/blue_view"
        app:layout_constraintStart_toStartOf="parent"
        app:layout_constraintEnd_toEndOf="parent"
        />

</androidx.constraintlayout.widget.ConstraintLayout>
3. Android Activity Lifecycle
- 사용자가 앱을 탐색하고, 나가고, 다시 돌아가면, 앱의 Activity 인스턴스는 수명 주기 안에서 서로 다른 상태를 통해 전환됨.
- Activity Class: 활동이 상태 변화를 알아차릴 수 있는 여러 Callback 제공.
- Lifecycle Callback 메서드: 사용자가 활동을 벗어나거나 다시 돌아왔을 때 활동 작동 방식을 선언할 수 있음.
- 예방 가능한 상황
- Ex 1) 사용자가 앱을 사용하는 도중 전화가 걸려오거나 다른 앱 전환시 비정상 종료되는 문제
- Ex 2) 사용자가 앱을 활발히 사용하지 않아 생기는 시스템 리소스 낭비
- 예방 가능한 상황
Activity Lifecycle
- onCreate() : 시스템이 먼저 활동을 생성할 때 실행 > 필수적으로 구현해야함.
- onStart() : 활동이 시작된 상태에 들어갈 때 콜백 호출
- onResume() : 활동이 재개된 상태에 들어가면 포그라운드에 표시되고 콜백 호출
- onPause()
- 사용자가 활동을 떠나는 것을 나타내는 첫 번째 신호로 호출
- 잠시 후 다시 시작할 작업을 일시중지하거나 조정함
- onStop()
- 활동이 사용자에게 더이상 표시되지 않으면 중단됨 상태에 들어가고 콜백 호출
- 앱이 사용자에게 보이지 않는 동안, 앱은 필요하지 않은 리소스를 해제하거나 조정해야함.
- onDestroy()
- 활동이 소멸되기 전에 호출
- 활동이 종료되는 경우
- 구성 변경으로 인해 시스템이 일시적으로 활동을 소멸시키는 경우(ex. 기기 화면 회전, 멀티 윈도우 모드)
- 이전의 콜백에서 아직 해제되지 않은 모든 리소스(ex : onStop())를 해제해야 함.
- 활동이 소멸되기 전에 호출
'Group Study (2021-2022) > Android' 카테고리의 다른 글
| [Android] 6주차 스터디 - FCM (Firebase Cloud Messaging) (0) | 2021.11.14 |
|---|---|
| [Android]5주차 스터디 - material design , Retrofit2 (0) | 2021.11.07 |
| [Android] 4주차 스터디 - 클론 코딩 진행 상황, 인상 깊었던 내용 (0) | 2021.11.02 |
| [Android] 3주차 스터디 - Camera, Firebase (0) | 2021.10.16 |
| [Android]2주차 스터디 - Intent, RecyclerView (0) | 2021.10.08 |